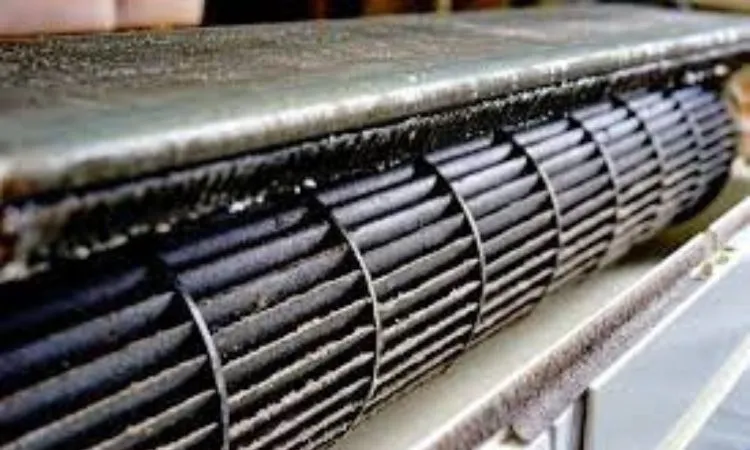
Have you ever noticed that your mini split air conditioner isn’t cooling or heating as efficiently as before? A dirty blower wheel might be the culprit. Not cleaning it regularly can lead to serious issues like reduced airflow, energy waste, and even potential mold growth, impacting both comfort and health.
To clean a mini split blower wheel, you’ll need to turn off the unit, open the front cover, and carefully clean the wheel using a soft brush and cleaning solution. Regularly maintaining this component significantly boosts your unit’s performance and lifespan.
Ignoring the cleanliness of your blower wheel can lead to bigger issues than just inefficient cooling. Imagine mold spores silently affecting your family’s health or inflated electricity bills hitting your wallet. Understanding how and why to keep your blower wheel clean helps avoid these hidden troubles.
Why does a mini split blower wheel get growth on it?
You might be surprised when opening your mini split air conditioner to see mold or mildew growing inside. The blower wheel is a common place for such growth due to its environment.
Mini split blower wheels get growth because they often operate in humid conditions. The combination of moisture, dust, and fluctuating temperatures creates the perfect breeding ground for mold, mildew, and bacteria.
Factors causing growth on blower wheels
Three main factors contribute to growth on blower wheels:
- Humidity: Warm, humid air condenses on the cool surfaces of the blower wheel, creating dampness. This moisture attracts mold and mildew spores.
- Dust Accumulation: Dust provides nutrients needed for mold growth, making blower wheels more prone to contamination when dust collects.
- Poor Maintenance: Infrequent cleaning or inadequate maintenance schedules increase the likelihood of mold and bacteria buildup.
| Factor | How it Encourages Mold Growth |
|---|---|
| Humidity | Creates a moist environment for mold spores |
| Dust Accumulation | Provides nutrients and anchors for growth |
| Poor Maintenance | Allows buildup of dirt, moisture, and spores |
Keeping humidity controlled, regularly removing dust, and sticking to cleaning schedules reduces growth significantly.
What affect would a dirty blower wheel have on your split?
When dirt accumulates on your mini split blower wheel, you might notice some significant changes in how it works. Understanding these effects can motivate you to keep it clean.
A dirty blower wheel reduces airflow, making your mini split less efficient. It can cause higher energy bills, poor cooling or heating performance, increased noise, and even damage other internal components due to extra strain.
Problems caused by a dirty blower wheel
- Reduced Efficiency: Dirt buildup restricts airflow, causing your system to work harder. This increases your electricity bill significantly.
- Poor Air Quality: Dirt and mold spores spread through the room, affecting the health of those inside, especially those with allergies or asthma.
- Increased Wear: Excessive strain on your mini split’s motor due to restricted airflow can cause premature failure.
Efficiency and cost implications
| Issue | Consequences |
|---|---|
| Reduced Efficiency | Higher electricity bills, decreased comfort |
| Poor Air Quality | Respiratory issues, increased allergens |
| Increased Wear | Higher repair costs, shortened lifespan |
Regular cleaning prevents these problems, ensures better air quality, and prolongs the lifespan of your mini split system.
How often should you clean a mini split blower wheel?
Determining the best cleaning schedule for your mini split blower wheel depends on several factors. Knowing when to clean helps maintain efficiency and air quality.
Clean your mini split blower wheel at least once every six months. In humid or dusty environments, increase this frequency to once every three months. This routine ensures optimum performance and air quality.
Factors affecting cleaning frequency
- Usage: Units used frequently need more regular cleaning.
- Environment: Areas with high humidity or dust require more frequent cleaning.
- Health Concerns: If occupants have respiratory conditions, cleaning more often reduces health risks.
| Environmental Condition | Recommended Cleaning Frequency |
|---|---|
| Standard conditions | Every 6 months |
| Humid climates | Every 3 months |
| High dust areas | Every 3 months |
| Allergy-prone residents | Every 3 months or sooner |
Keeping a regular cleaning schedule protects your investment and ensures healthy indoor air.
What can I use to clean mini split blower wheel?
Choosing the right cleaning tools and products is essential. Proper products remove grime effectively without harming the blower wheel.
Use gentle cleaning agents like mild detergent or specialized coil cleaners, soft brushes, and microfiber cloths. Avoid abrasive materials or harsh chemicals that might damage the blower wheel surface or other components.
Recommended tools and cleaners
- Soft brush or toothbrush: For gentle removal of dirt.
- Microfiber cloths: Efficiently remove grime without scratching surfaces.
- Specialized coil cleaners: Safely break down dirt without harming delicate metal surfaces.
- Vacuum cleaner with brush attachment: Useful for initial dust removal.
| Tool or Cleaner | Benefits |
|---|---|
| Mild detergent | Safe, effective on most dirt |
| Coil cleaner (foam spray) | Specialized cleaning, minimal scrubbing |
| Microfiber cloths | Safe, non-abrasive cleaning |
Avoid bleach or other harsh chemical cleaners, as they can corrode internal parts or discolor surfaces.
How to clean mini split blower wheel without removing?
Not everyone is comfortable removing components from their mini split. Luckily, cleaning the blower wheel without removal is achievable.
To clean a mini split blower wheel without removing it, turn off the unit, lift the front cover, spray a gentle cleaner directly on the wheel, then gently brush and wipe dirt away. Allow the wheel to dry completely before use.
Step-by-step guide for cleaning without removal
- Turn off power: Ensure safety by unplugging or switching off the breaker.
- Open front panel: Lift or unscrew the front cover gently.
- Apply cleaner: Spray the cleaner evenly on the wheel.
- Brush gently: Use a soft brush to loosen dirt.
- Wipe and clean thoroughly: Carefully remove dirt with a microfiber cloth.
- Dry completely: Allow at least one hour for drying.
| Steps | Details |
|---|---|
| Power off | Essential safety measure |
| Cleaner application | Gentle, evenly sprayed foam cleaner |
| Gentle brushing | Loosen dirt without damaging fins |
| Drying | Prevent mold regrowth by allowing thorough drying |
Cleaning the blower wheel without removing it is practical, saves time, and keeps your mini split in excellent condition.
Conclusion
Cleaning your mini split blower wheel regularly improves efficiency, saves money, enhances indoor air quality, and extends your system’s lifespan. Follow recommended cleaning intervals, use suitable tools, and understand simple cleaning methods to maintain peak performance.