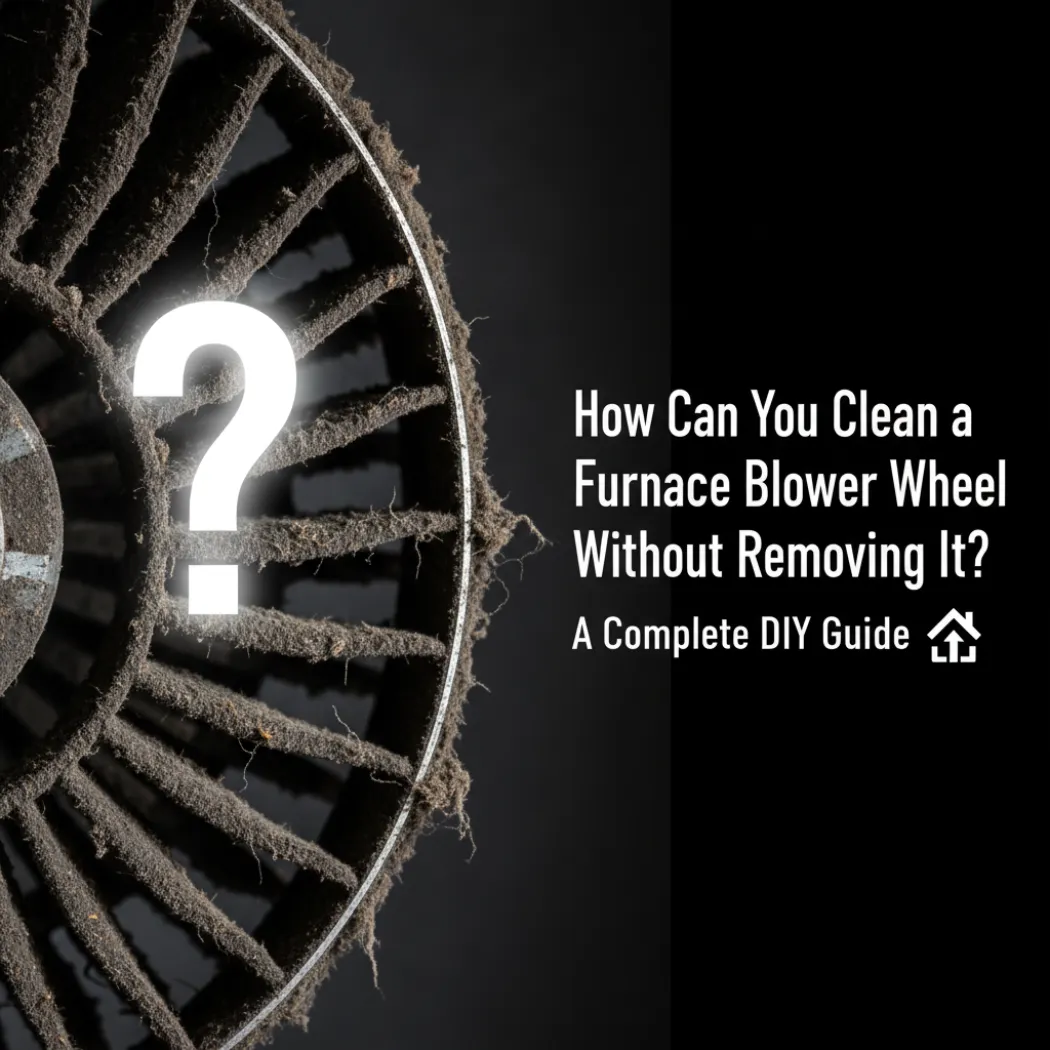
Is your furnace suddenly struggling to push air through your vents? Do you hear strange whirring noises or notice your energy bills creeping up for no reason? These are common signs that your furnace’s blower wheel, the heart of your home’s air circulation system, is choked with dirt and grime.
Yes, you can effectively clean a furnace blower wheel without removing it by following a strict safety protocol to disconnect all power. Using a combination of a shop vacuum with specific attachments, long-handled brushes, and compressed air, you can access the blower housing and meticulously remove the layers of dust, lint, and debris from the individual fan blades.
Many homeowners feel intimidated by this task, fearing they might damage the furnace. But leaving it dirty guarantees poor performance and can lead to costly repairs. This comprehensive guide will walk you through every step of the process, transforming you from a worried homeowner into a confident DIYer. Let’s restore your furnace’s power and efficiency, together.
Why Is Cleaning Your Furnace Blower Wheel So Important?
Cleaning your furnace blower wheel is critically important because a dirty wheel severely restricts airflow, forcing your furnace to work harder. This leads directly to higher energy bills, reduced home comfort, increased strain on the motor, and potentially causing the system to overheat and shut down or fail prematurely.
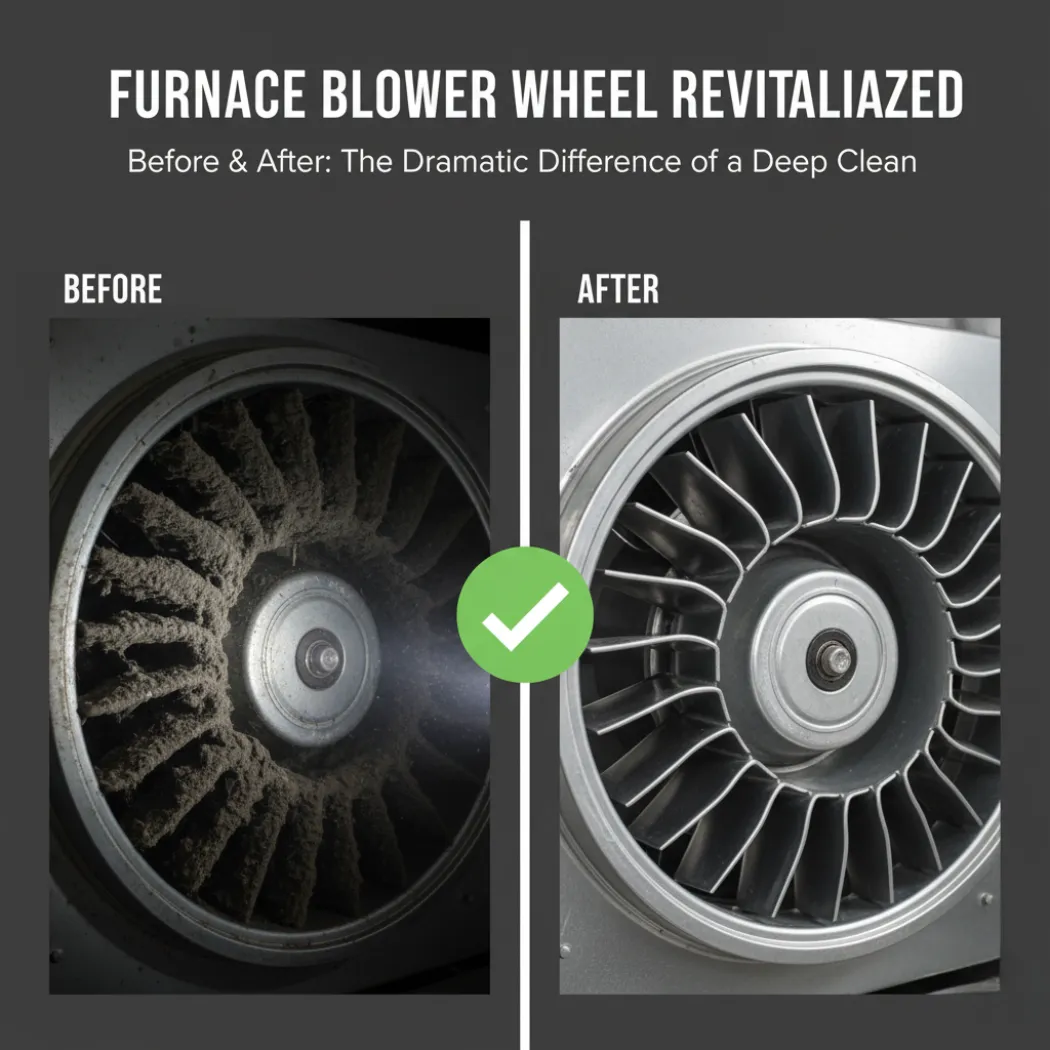
Think of the blower wheel as the lungs of your HVAC system. It’s a carefully balanced cylindrical fan with dozens of curved blades (also called fins). As it spins, it pulls air from your home through the filter and pushes it across the heat exchanger (or AC coil) and out through your vents. When these blades are caked in a thick blanket of dust, the entire process becomes inefficient.
The Impact of a Dirty Wheel on Airflow and Comfort
The primary job of the blower wheel is to move a specific volume of air, measured in Cubic Feet per Minute (CFM). The buildup of dirt, dust, and grime on each blade changes its aerodynamic shape and adds weight. This seemingly small change has a massive impact. The wheel can no longer move the volume of air it was designed for. You’ll feel this as weak or inconsistent airflow from your vents. Rooms farthest from the furnace might not get enough heat in the winter or cool air in the summer, leading to uncomfortable hot and cold spots throughout your home.
How Accumulated Grime Increases Your Energy Bills
When airflow is restricted, your furnace’s motor must work significantly harder and run longer to try and satisfy your thermostat’s setting. It’s like trying to run a marathon while breathing through a straw. This extra effort consumes a lot more electricity. A dirty blower wheel can increase your heating and cooling energy consumption by as much as 15-20%. Cleaning it is one of the most effective ways to lower your utility bills and improve your home’s energy efficiency.
Are You Risking System Damage? The Link Between a Clogged Wheel and Motor Overheating
The strain on the blower motor doesn’t just hurt your wallet; it can damage your furnace. The motor is designed to work against a certain amount of pressure. A clogged wheel increases this pressure, forcing the motor to draw more electrical current, which generates excess heat. This can lead to premature motor burnout. Furthermore, reduced airflow across the heat exchanger can cause it to get too hot, tripping a safety limit switch. In a worst-case scenario, repeated overheating can lead to a cracked heat exchanger, a serious safety hazard that often requires a full furnace replacement.
What Are the Signs of a Dirty Blower Wheel?
Your furnace will often give you clues that the blower wheel needs attention. Be on the lookout for:
- A noticeable decrease in airflow from your vents.
- Your furnace running for longer cycles than it used to.
- Unusual noises, like a humming or whirring sound, from the furnace unit.
- A sudden increase in your home’s dust levels.
- Your utility bills are unexplainably high.
What Are the Essential Safety Steps Before You Begin?
Before you even think about cleaning, you must follow a critical safety sequence to guarantee your protection. This involves completely shutting off all electrical power to the furnace at the main circuit breaker, verifying the power is off with a voltage tester, and wearing appropriate personal protective equipment (PPE) like gloves and safety glasses.
Working on a furnace involves serious risks, primarily from high-voltage electricity. There are no shortcuts when it comes to your safety. Follow these steps precisely and in order. Do not proceed until you have completed all of them.
Step 1: Turning Off All Power at the Breaker Box
Your furnace has a dedicated switch, often located on or near the unit itself. First, turn this switch off. However, this is not enough. You must go to your home’s main electrical panel (the breaker box). Locate the circuit breaker that is labeled for your “Furnace,” “HVAC,” “Air Handler,” or “AHU.” Firmly flip this breaker to the “OFF” position. This is the only way to ensure the entire unit is de-energized.
Step 2: How to Confirm the Power is Off with a Voltage Tester
Pro Tip: Never trust that a switch or breaker has done its job. Always verify. This step is non-negotiable for your safety.
After flipping the breaker, return to the furnace. Remove the service panel that covers the blower compartment. Using a non-contact voltage tester (a simple and inexpensive tool available at any hardware store), carefully bring the tip of the tester near the main power wires leading into the furnace control board. The tester should not light up or make any noise. This confirms that the power is truly off.
Step 3: Which Personal Protective Equipment (PPE) is Necessary?
Furnace interiors are dirty and have many sharp metal edges. Protect yourself by wearing the right gear:
- Safety Glasses: To protect your eyes from falling dust, debris, and sharp corners.
- Work Gloves: To protect your hands from cuts on the sheet metal housing.
- Dust Mask (N95 recommended): You will be stirring up years of fine dust, dander, and other allergens. A mask is essential to avoid inhaling these particulates.
Step 4: Ensuring Proper Ventilation in Your Workspace
The area around your furnace, often a basement or closet, can have poor airflow. Open a nearby window or door if possible. This helps dissipate the dust you’ll be loosening and ensures you have fresh air to breathe while you work. Good lighting is also crucial, so bring a bright flashlight or a headlamp to clearly see inside the blower housing.
Which Tools and Materials Do You Need for the Job?
To properly clean the blower wheel without removing it, you’ll need a specific set of tools for access, brushing, and debris removal. This includes a nut driver or screwdriver to open the access panel, a flashlight, various long-handled brushes, a powerful shop vacuum with attachments, and a can of compressed air for fine-tuning.
Having the right tools ready before you start makes the job much smoother and more effective. You don’t need expensive, specialized equipment, but gathering these items will make a world of difference. Here’s a detailed breakdown of your toolkit.
Essential Tools for Access and Visibility
These tools get you inside the furnace and allow you to see what you’re doing.
- Nut Driver or Screwdriver Set: Most furnace access panels are held in place by 1/4″ or 5/16″ hex-head screws. A nut driver is often easier to use in tight spaces than a screwdriver.
- Flashlight or Headlamp: It’s dark inside a furnace housing. A bright, directable light source is absolutely essential. A headlamp is ideal as it keeps both of your hands free.
Key Cleaning Implements
This is your primary arsenal for dislodging the caked-on grime.
- Stiff-Bristled Brush: A long, narrow brush (like a radiator brush or a dryer vent brush) is perfect for reaching deep into the housing and scrubbing the blades.
- Bottle Brush / Toothbrush: A sturdy bottle brush can help clean the inner curve of the blades. An old toothbrush is excellent for detailed work on the parts of the wheel you can easily reach.
Air and Vacuum Tools for Debris Removal
Once you loosen the dirt, you need to get it out of the furnace.
- Shop Vacuum: A standard household vacuum is not powerful enough. A shop vac with a long hose and various attachments (especially a crevice tool and a small brush attachment) is crucial for sucking up the debris.
- Can of Compressed Air: This is for the final step. It helps blow out fine dust from tight crevices that a brush or vacuum can’t reach.
Recommended Cleaning Solutions
In most cases, a dry cleaning is sufficient. If you encounter greasy or sticky residue, you may need a mild cleaning solution.
- Spray Bottle with Water and Mild Detergent: A few drops of dish soap in a spray bottle of water can help break down greasy buildup. Use this sparingly to avoid getting electrical components wet.
| Tool Name | Purpose | Pro Tip |
|---|---|---|
| Nut Driver / Screwdriver | To open the furnace access panels. | Keep screws in a magnetic tray so you don’t lose them. |
| Headlamp | To provide hands-free illumination inside the dark housing. | A bright LED headlamp gives the truest view of how much dirt is left. |
| Stiff, Long-Handled Brush | Main tool for scrubbing and loosening dirt from fan blades. | Choose a brush with firm but not metal bristles to avoid scratching the wheel. |
| Shop Vacuum | To remove all loosened debris from the housing. | Use the crevice tool attachment to get into tight corners. |
| Can of Compressed Air | For a final blowout of fine dust from hard-to-reach areas. | Use short bursts to control the direction of the dust. |
| Safety Glasses, Gloves, Mask | To protect you from dust, cuts, and debris. | Do not skip this. Your safety is the highest priority. |
How Do You Clean the Blower Wheel Without Removing It (The Step-by-Step Method)?
The step-by-step method involves gaining clear access to the blower housing, performing an initial vacuuming of all loose debris, methodically scrubbing each fan blade with brushes while rotating the wheel by hand, and finishing with a final detailed vacuum and compressed air clean-up before closing the unit.
This is where your preparation pays off. Work slowly and methodically. The goal is not speed, but thoroughness. Remember, every bit of dirt you remove contributes to better performance and efficiency. Let’s get started.
Gaining Access: Locating and Opening the Blower Compartment Door
With the power confirmed off, locate the service panel for the blower compartment. This is typically the bottom door on a standard upflow furnace. Use your nut driver or screwdriver to remove the screws holding it in place. Set the panel and screws aside somewhere safe. You should now have a clear view of the blower assembly, which looks like a large “squirrel cage” inside a metal housing.
The First Pass: Using a Vacuum to Remove Loose Dust and Debris
Before you start scrubbing, use your shop vacuum with the crevice tool attachment. Carefully vacuum the entire floor of the blower compartment. Suck up any loose dust, lint, cobwebs, and debris. Then, vacuum the exterior of the blower housing itself. This initial pass prevents you from just spreading more dust around later.
The Deep Clean: Systematically Brushing and Wiping Each Fan Blade
This is the most time-consuming part. Take your long, stiff-bristled brush and insert it into the opening of the blower housing, reaching the fan blades.
- Start at one point on the wheel. Use the brush to scrub the blades in a downward motion, following their curve. You will see dust and grime fall off.
- Reach as far across the blades as you can. After scrubbing a section, reach in with your gloved hand and slowly and gently rotate the wheel a few inches to expose a new section of dirty blades.
- Continue this process: scrub a section, rotate the wheel, scrub the next section. Be patient and systematic, ensuring you cover the entire circumference of the wheel.
- For stubborn spots or the edges of the wheel you can see clearly, use your smaller toothbrush or bottle brush for more focused scrubbing.
- Periodically stop and use the shop vacuum to suck up the debris you have dislodged from the bottom of the housing.
The Final Touch: Using Compressed Air to Dislodge Stubborn Particles
Once you have brushed and vacuumed the wheel as best you can, take your can of compressed air. Use the thin straw attachment for a focused blast of air. Aim it at the crevices between the blades and at the center hub of the wheel. This will blow out the last bits of fine dust that the brushes couldn’t reach. Follow immediately with the shop vacuum to capture the airborne dust before it settles again. Perform one last, thorough vacuuming of the entire compartment before you close everything up.
What Are the Limitations and When Should You Call a Professional?
While cleaning without removal is effective for routine maintenance, it has limitations. This DIY method may not be sufficient for extremely heavy, greasy contamination, visible rust or corrosion, or if the blower wheel is mechanically damaged, unbalanced, or making grinding noises, which requires a professional inspection.
It’s important to be honest about the limits of this DIY task. Recognizing when a problem is beyond a simple cleaning can save you time and prevent you from causing accidental damage. Here are the clear signs that it’s time to put down the tools and call a certified HVAC technician.
Is the Grime Caked-On or Oily? Recognizing Heavy Contamination
If the buildup on your blower wheel isn’t just dry dust but a thick, sticky, or greasy layer, a dry brushing won’t be enough. This often happens in homes with smokers, lots of cooking, or pets. Attempting to scrub this type of grime can just smear it around. A professional will remove the entire blower assembly for a deep chemical cleaning, which is the only way to properly resolve heavy contamination.
Do You See Signs of Rust or Corrosion on the Blades?
As you’re cleaning, inspect the metal blades closely with your flashlight. If you see spots of rust or corrosion, this is a red flag. Rust can flake off, throwing the wheel out of balance, and it indicates a potential moisture problem in your HVAC system that needs to be diagnosed by a professional.
If You Suspect the Wheel is Unbalanced, Bent, or Damaged
A properly functioning blower wheel is perfectly balanced to spin smoothly at high speeds. If you notice any bent blades, or if the wheel wobbles as you turn it by hand, it needs to be professionally serviced or replaced. An unbalanced wheel will cause loud vibrations, strain the motor bearings, and eventually lead to catastrophic motor failure.
Warning: If you hear a screeching, grinding, or loud metallic rattling from your furnace, turn it off immediately and call a professional. This indicates a serious mechanical failure.
Frequently Asked Questions (FAQ)
How often should I clean my furnace blower wheel?
For most homes, a good cleaning every 2 to 3 years is sufficient. However, if you have pets, live in a dusty area, or have family members with allergies, inspecting it annually and cleaning as needed is a better approach.
Can I use oven cleaner or harsh chemicals on my blower wheel?
Absolutely not. Harsh chemicals like oven cleaner can be corrosive and damage the galvanized coating on the metal blades, leading to premature rusting. They can also leave behind fumes that will circulate through your home. Stick to a dry cleaning or, if necessary, a very mild soap and water solution used sparingly.
What does a dirty furnace blower wheel sound like?
A dirty wheel often doesn’t make a loud noise itself, but it can cause secondary sounds. You might hear a low hum or drone from the overworked motor, or you might hear the sound of air “whistling” as it struggles to get past the clogged fins.
Is a dirty blower wheel a fire hazard?
While the dust itself is not highly flammable, a severely clogged wheel can cause the motor to overheat. An overheating electrical component is always a fire risk. So, indirectly, yes, it contributes to a less safe operating condition.
How much does it cost to have a professional clean a blower wheel?
Professional cleaning costs vary by location and company, but you can typically expect to pay between $150 and $400. This service usually involves removing the entire blower assembly for a much deeper and more thorough cleaning than is possible with the DIY method.
Will cleaning the blower wheel improve my home’s air quality and allergies?
Yes, it can help significantly. The blower wheel is a major source of re-circulated dust and allergens. Cleaning it removes a large reservoir of these irritants, and the improved airflow helps your furnace filter work more effectively to capture new particles.
Are there signs that my blower wheel is bad and needs replacement, not just cleaning?
Yes. Visible signs of damage like bent or broken blades, significant rust, or a wheel that wobbles on its axis are all clear indicators that it needs to be replaced. Additionally, if you clean it thoroughly and still have significant vibration or noise, the wheel is likely out of balance and should be replaced.
Do high-efficiency furnaces need their blower wheels cleaned more often?
Not necessarily more often, but it is just as important. High-efficiency furnaces often use variable-speed motors that are highly sensitive to airflow. A dirty wheel can negate the energy-saving benefits of these advanced systems, so keeping the wheel clean is key to maintaining peak efficiency.
Conclusion: From a Clean Wheel to Optimal System Performance
Congratulations on taking the initiative to clean your furnace blower wheel! By carefully following the steps for safety, preparation, and cleaning, you have restored a significant amount of your system’s efficiency and power. You’ve not only improved airflow and comfort but also lowered your energy bills and extended the life of your furnace motor. This is a maintenance task that delivers real, tangible rewards.
However, during your cleaning, you may have noticed that a simple cleaning isn’t enough. Perhaps you saw signs of rust, a slight wobble, or blades that were permanently bent. For industrial equipment, commercial HVAC systems, or in OEM manufacturing, performance is non-negotiable. A compromised blower wheel—even a slightly unbalanced or corroded one—is a liability that can lead to system failure and costly downtime. In these critical applications, replacement is the only reliable solution.
If your project demands unwavering performance, TSLBlower is your expert manufacturing partner. With over 20 years of specialized experience, we engineer and produce high-quality, durable blower wheels for the most demanding applications. We offer fully custom designs, rapid prototyping, and a zero-MOQ policy, making us the ideal partner for everything from a single replacement to a large-scale OEM production run. Don’t let a failing component compromise your system’s integrity. Contact TSLBlower today to discuss your specific requirements and get a quote within 24 hours.